In this article, you will learn how to enroll your clients to service plans.
Service Plans is a great tool for creating and managing recurring visits for general services or maintenance. With Service Plans, you can easily create service plan templates and subscribe your clients to those plans — not only allowing you to account for recurring work, but also ensure you are automatically getting paid on time.
Want to see how it works?
Experience this feature in action with a guided walkthrough!
In Workiz, you can enroll clients in a service plan using two different methods: from a service plan template or from a single-use custom plan.
How to enroll clients in service plans
Method 1: Using a plan template
After creating a service plan template, you can begin enrolling your clients to your plans. To learn more about creating a plan template, please see this article.
- Open the profile for the client you want to enroll
- In the client's profile, select Create new > Service plan
- Select the property address that this plan will apply to
- Select one of your plan templates
- Select Continue
Plan basics and duration
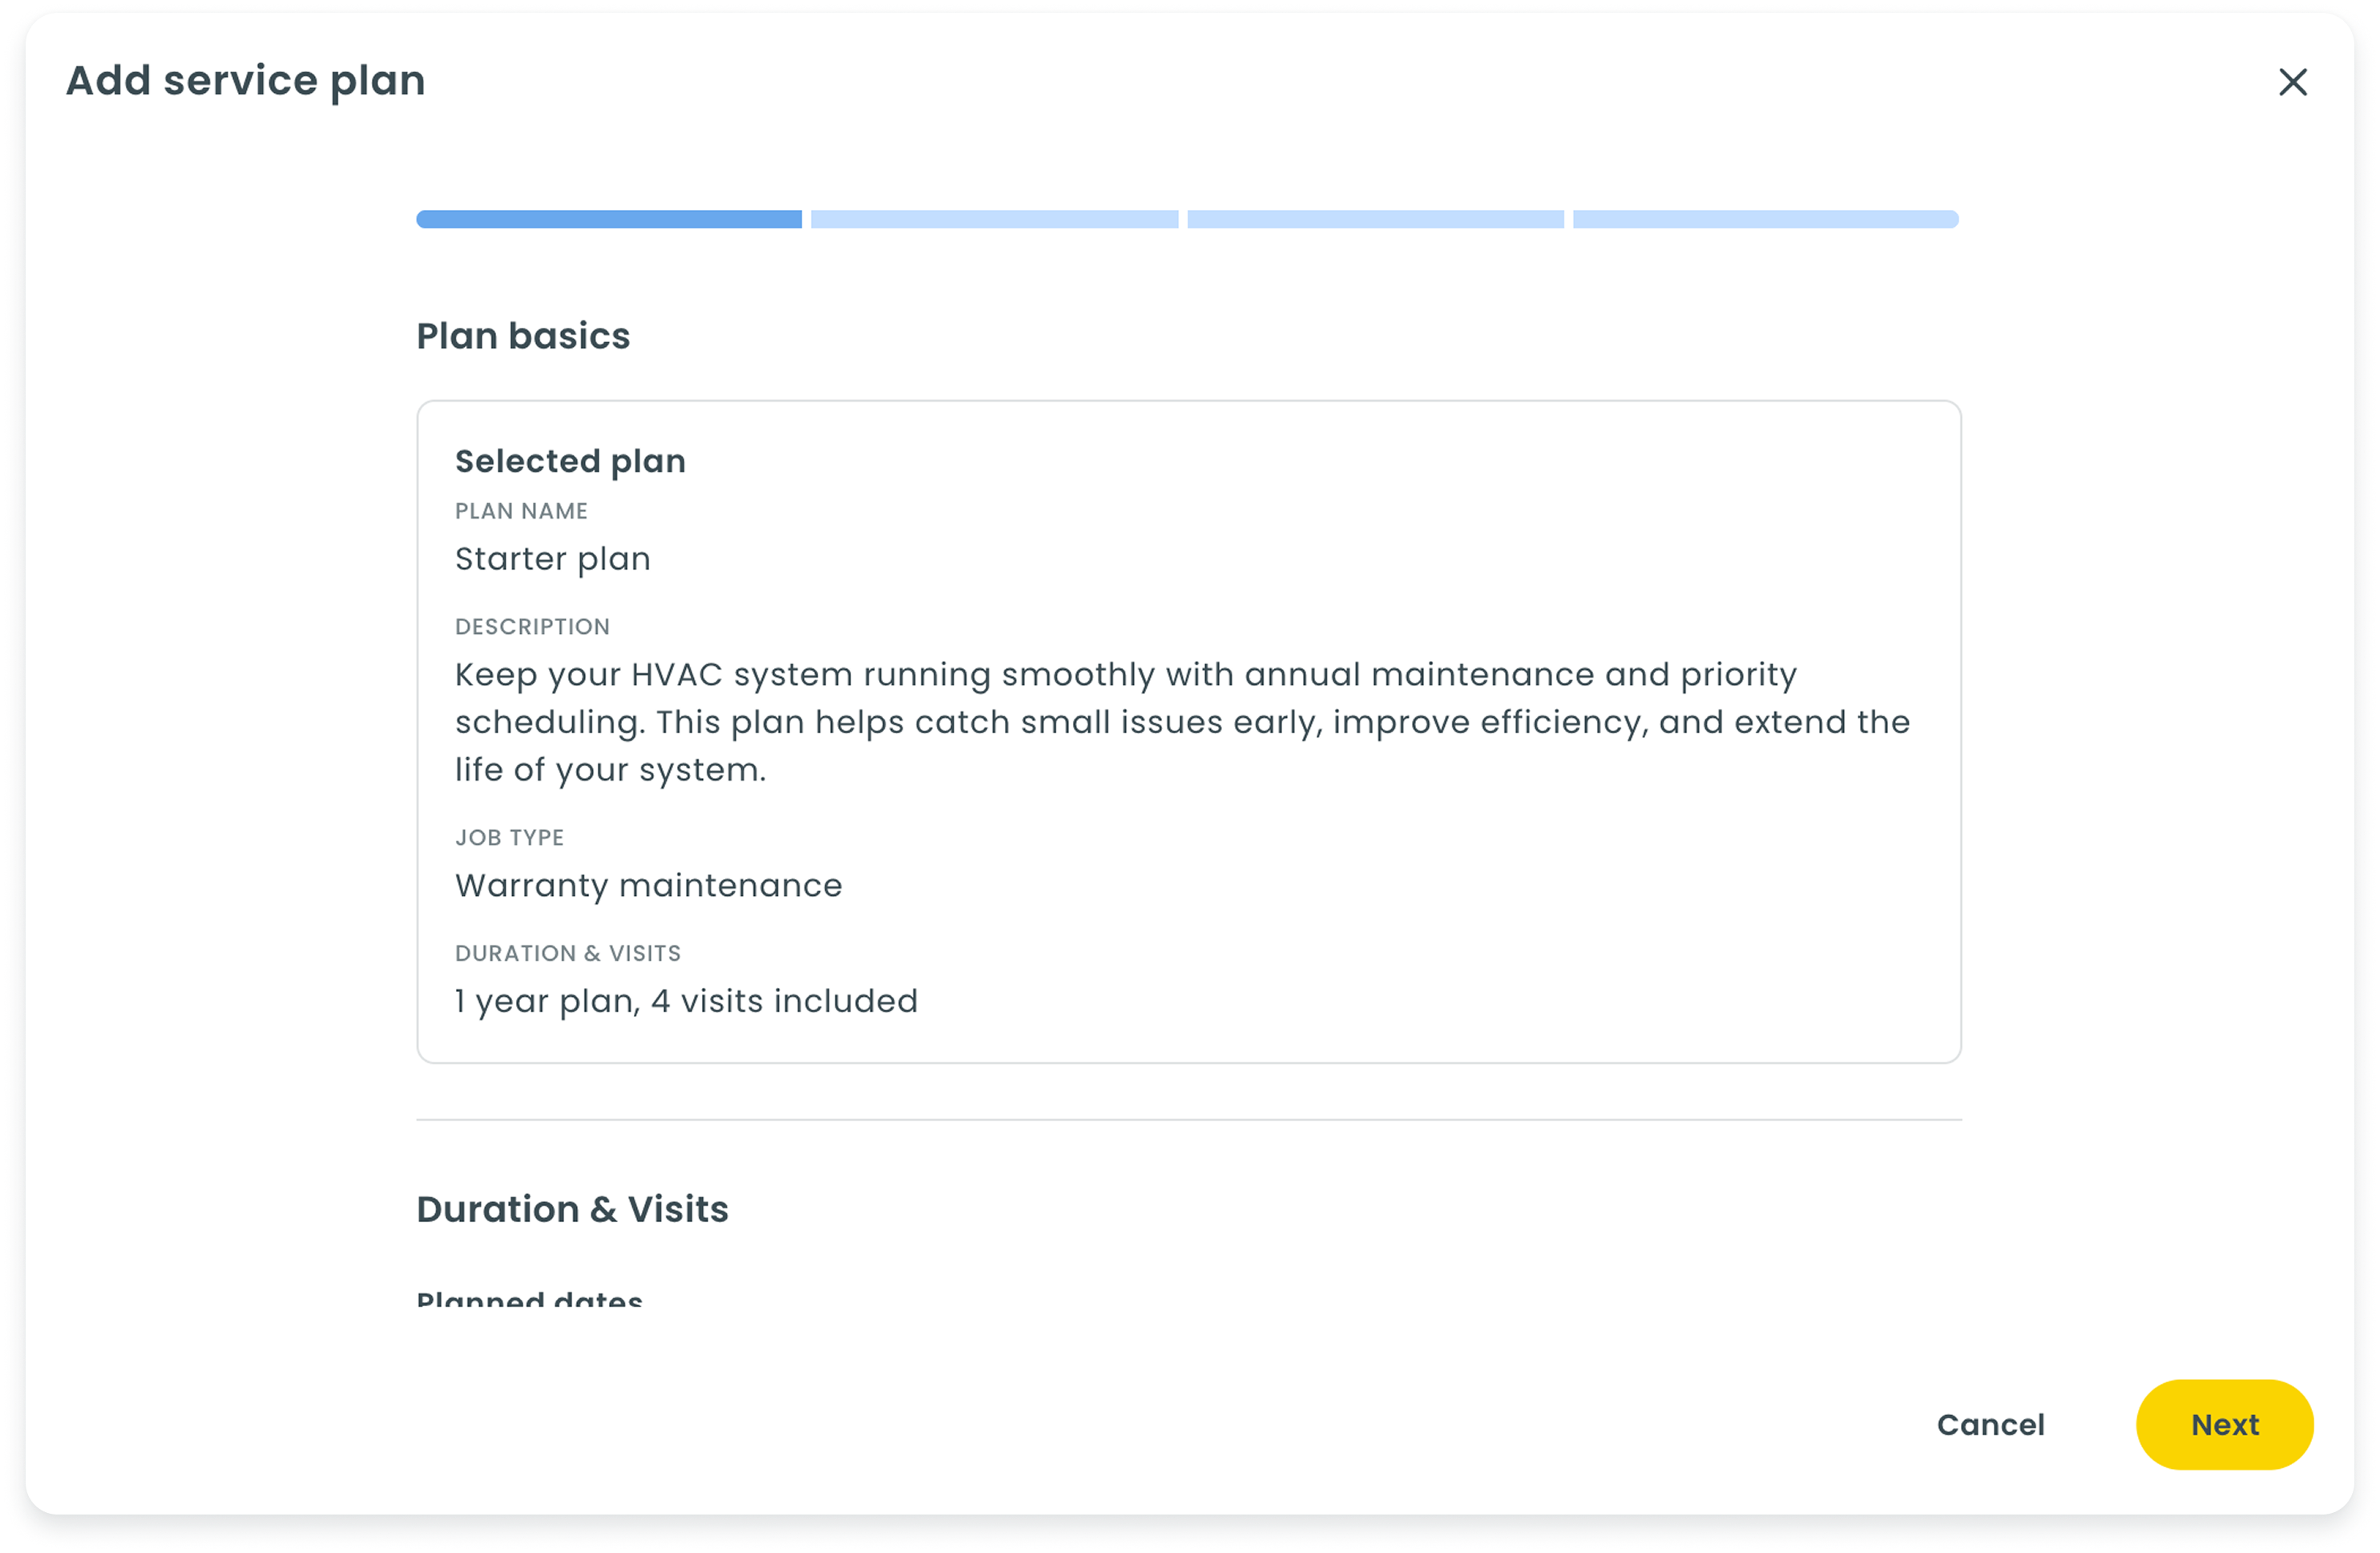
- (Optional) Modify the plans start date
- Decide if you want this plant to renew automatically and enable or disable the toggle switch accordingly
- Select Next
Pricing and billing
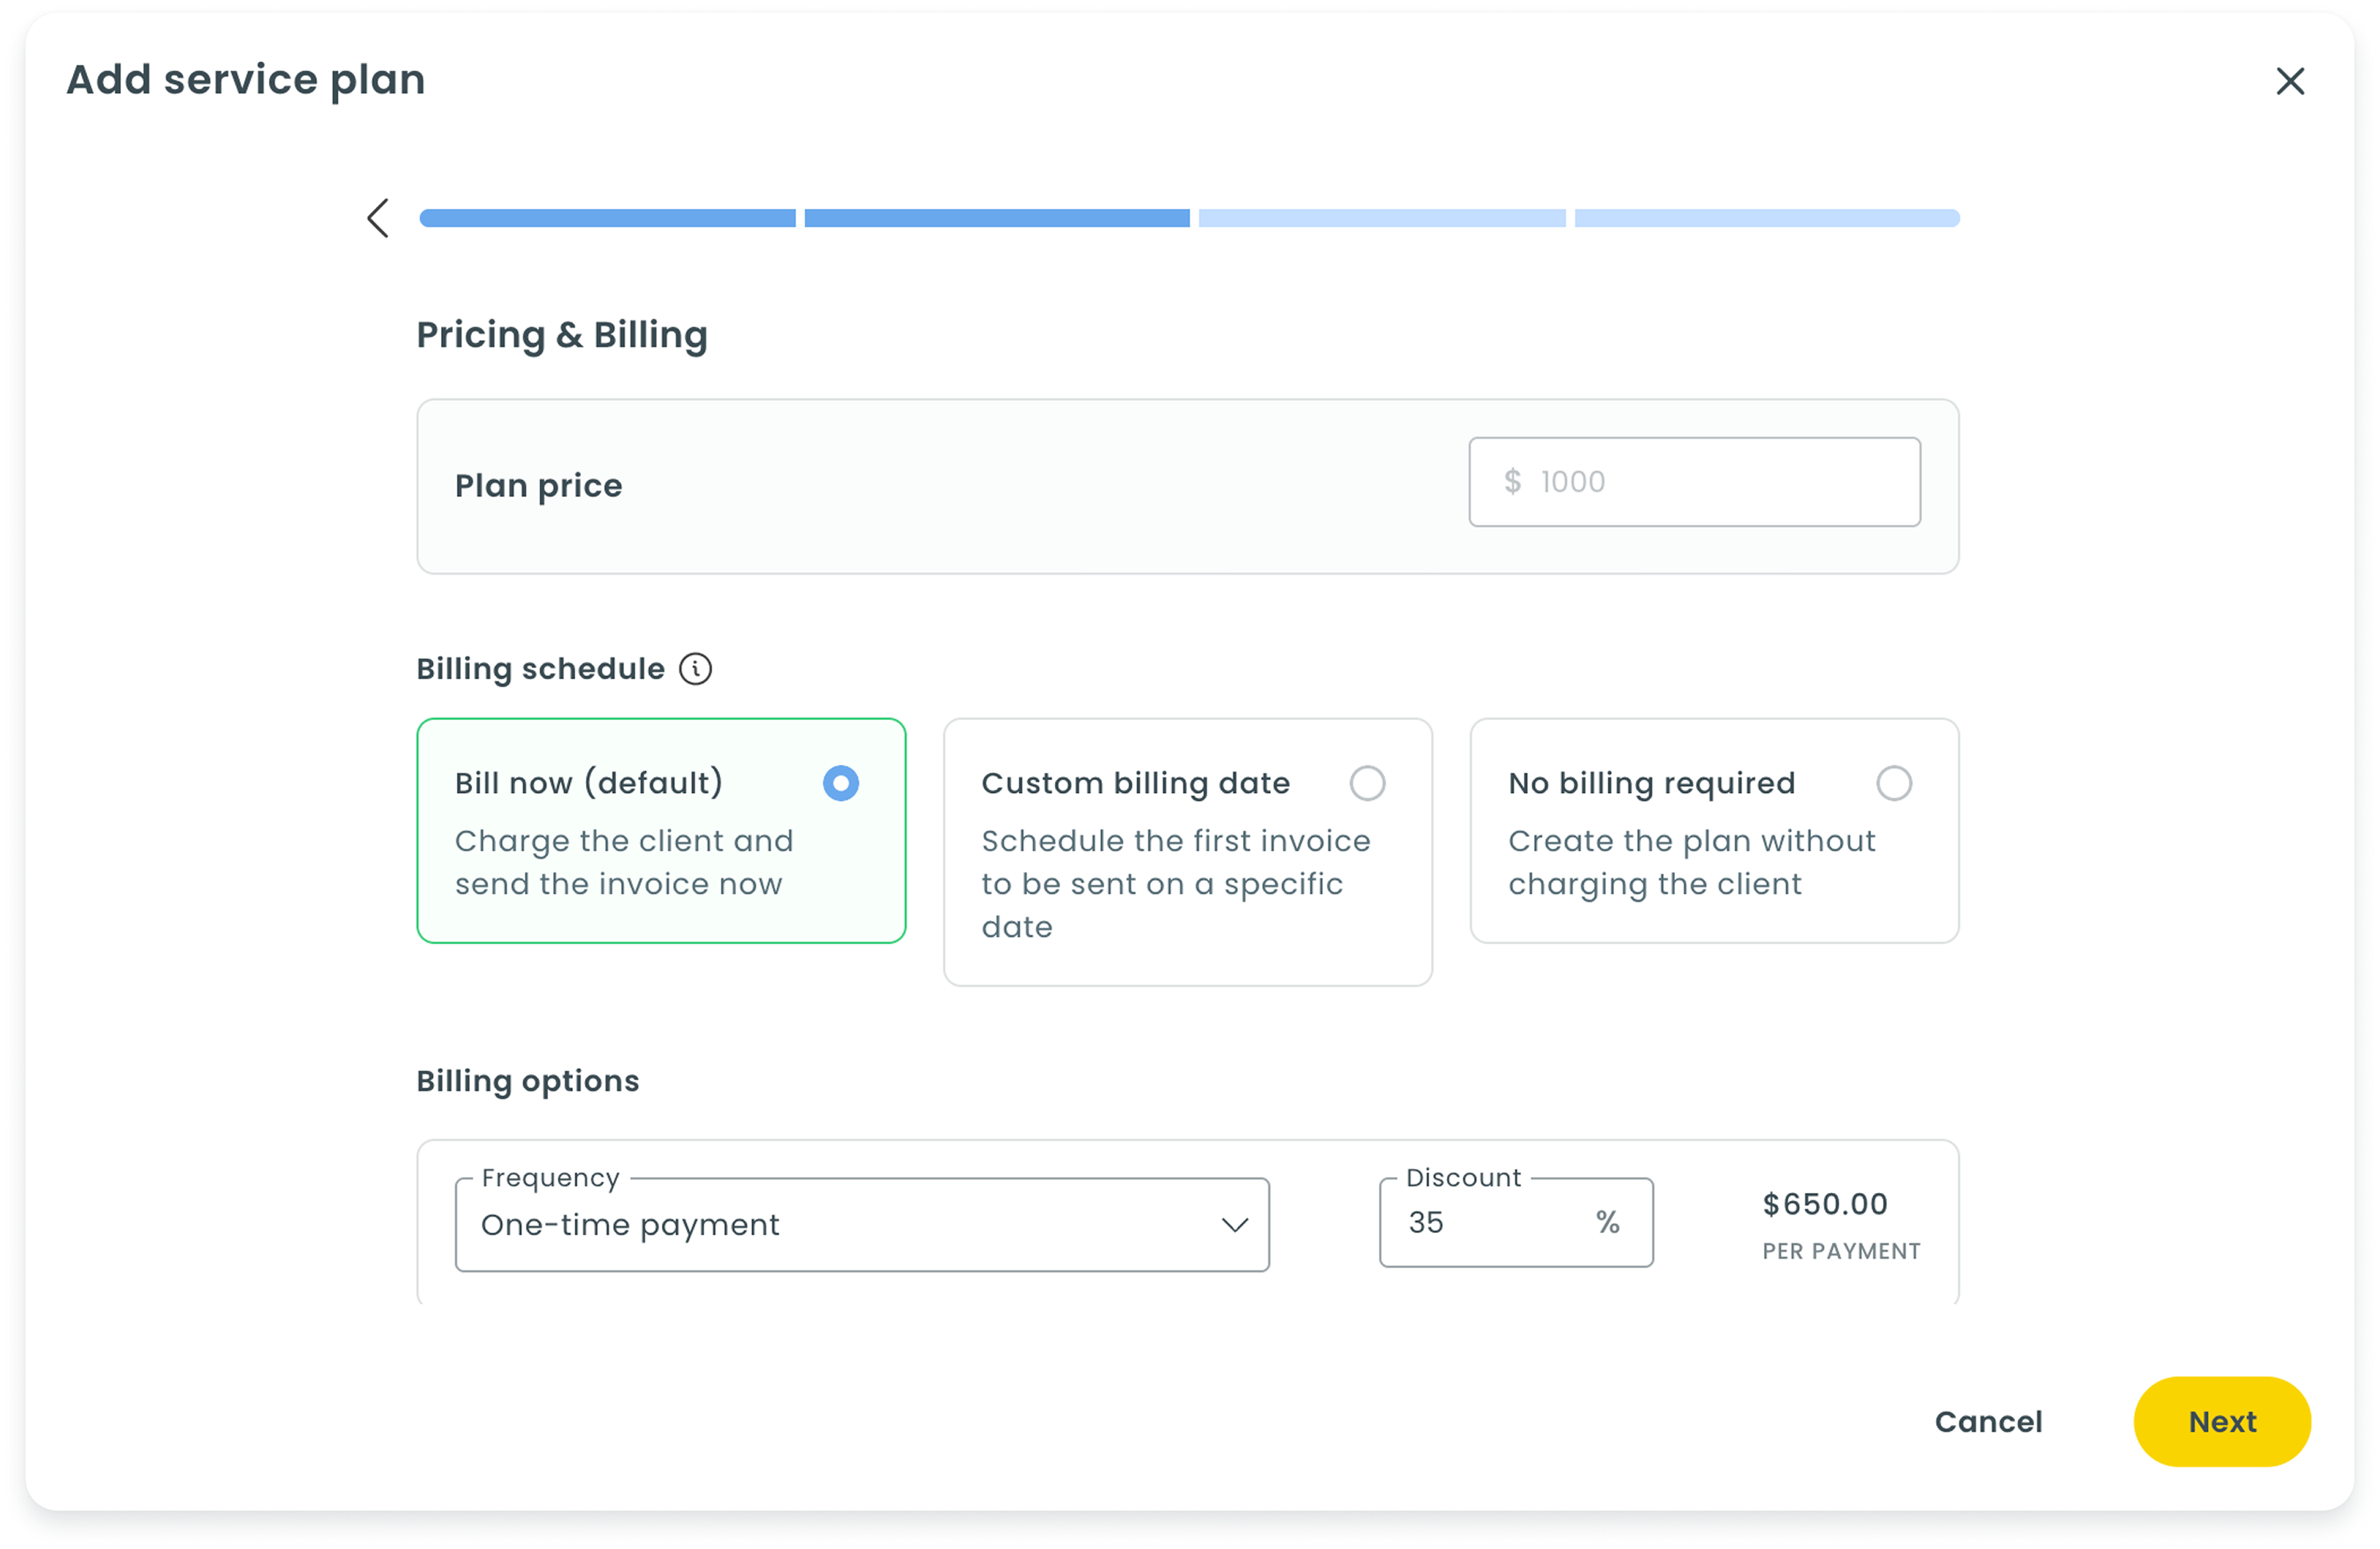
- Choose the billing schedule for this plan:
- Bill now: Charge the client and send the invoice now
- Custom billing date: Choose a specific date for the first invoice to be sent
- No billing required: Create the plan without requiring payment
- Set the billing frequency for this plan (e.g., annual, monthly, etc.)
- (Optional) Modify the discount applied for this plan
- Select Next
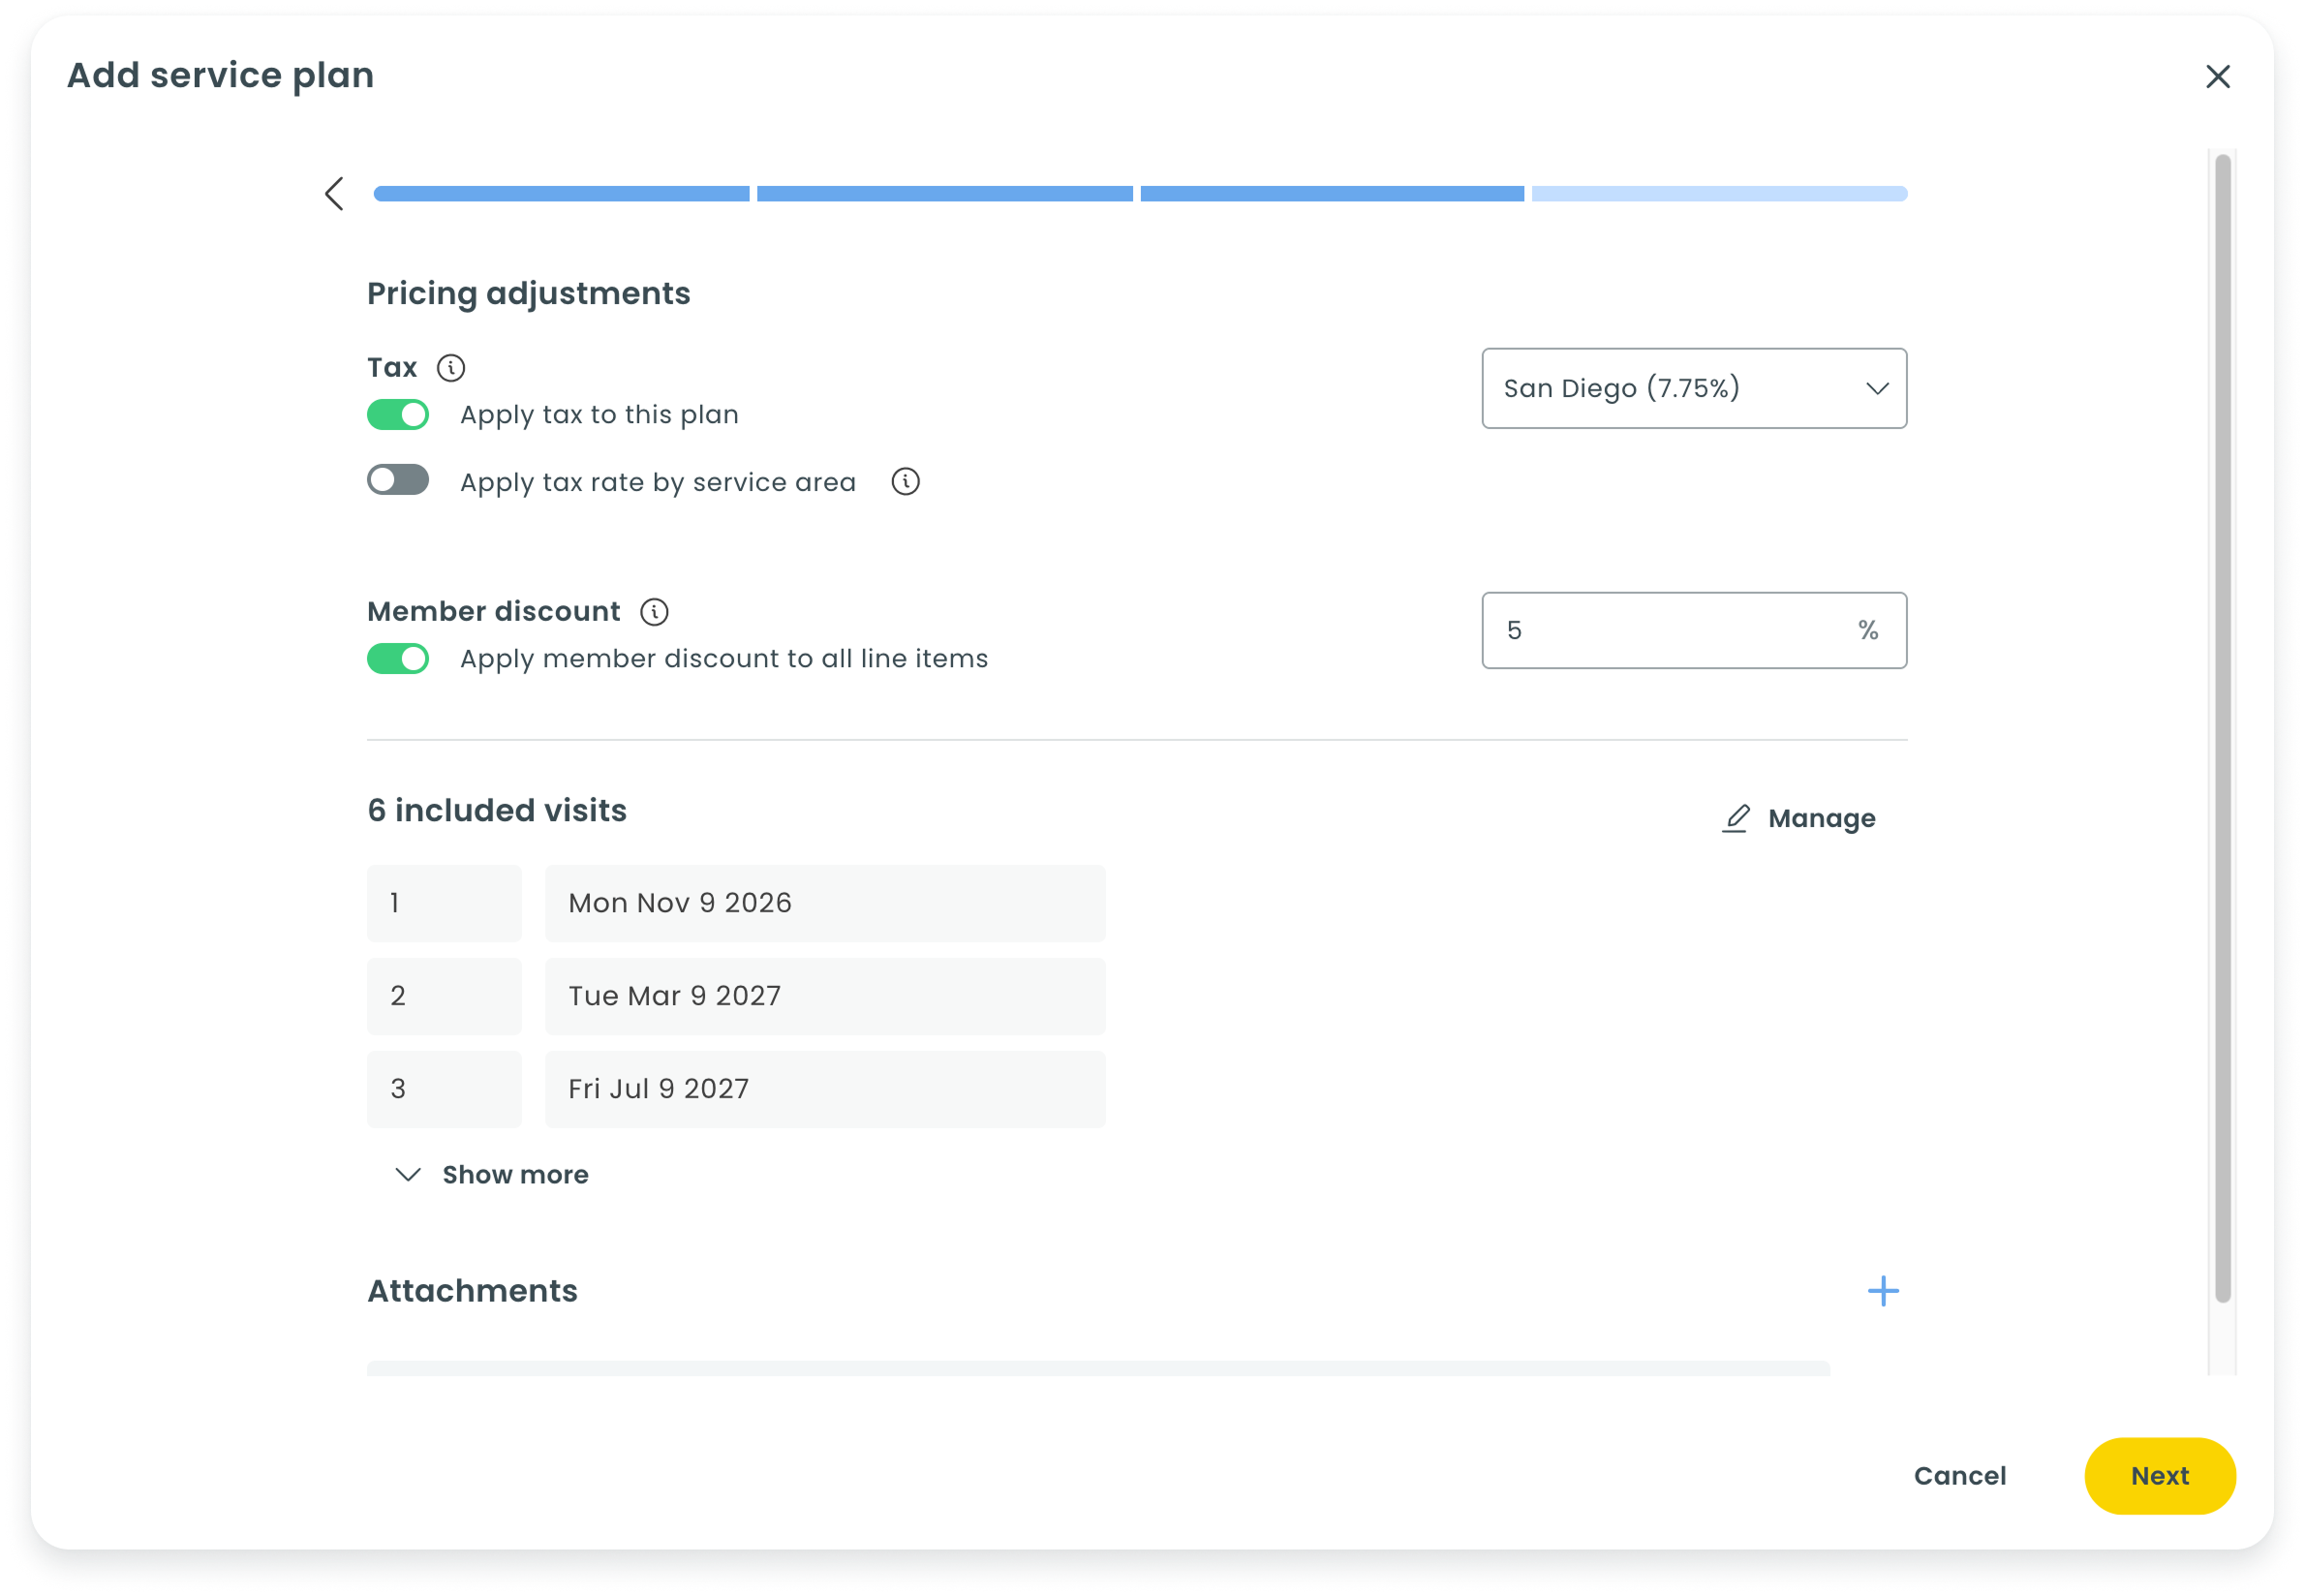
Pricing adjustments, visits, and attachments
-
Set whether this plan should be taxed or not
Also using using service areas? Set your service plan to automatically be taxed based on the client's service address.
- (Optional) Set a member discount to be applied across all line items for this client (i.e., future services)
- Set your visits for this plan (e.g., set dates manually, specific dates each month, specific weekday each month)
- (Optional) Add or remove attachments from this plan
- Select Next
Collecting payment
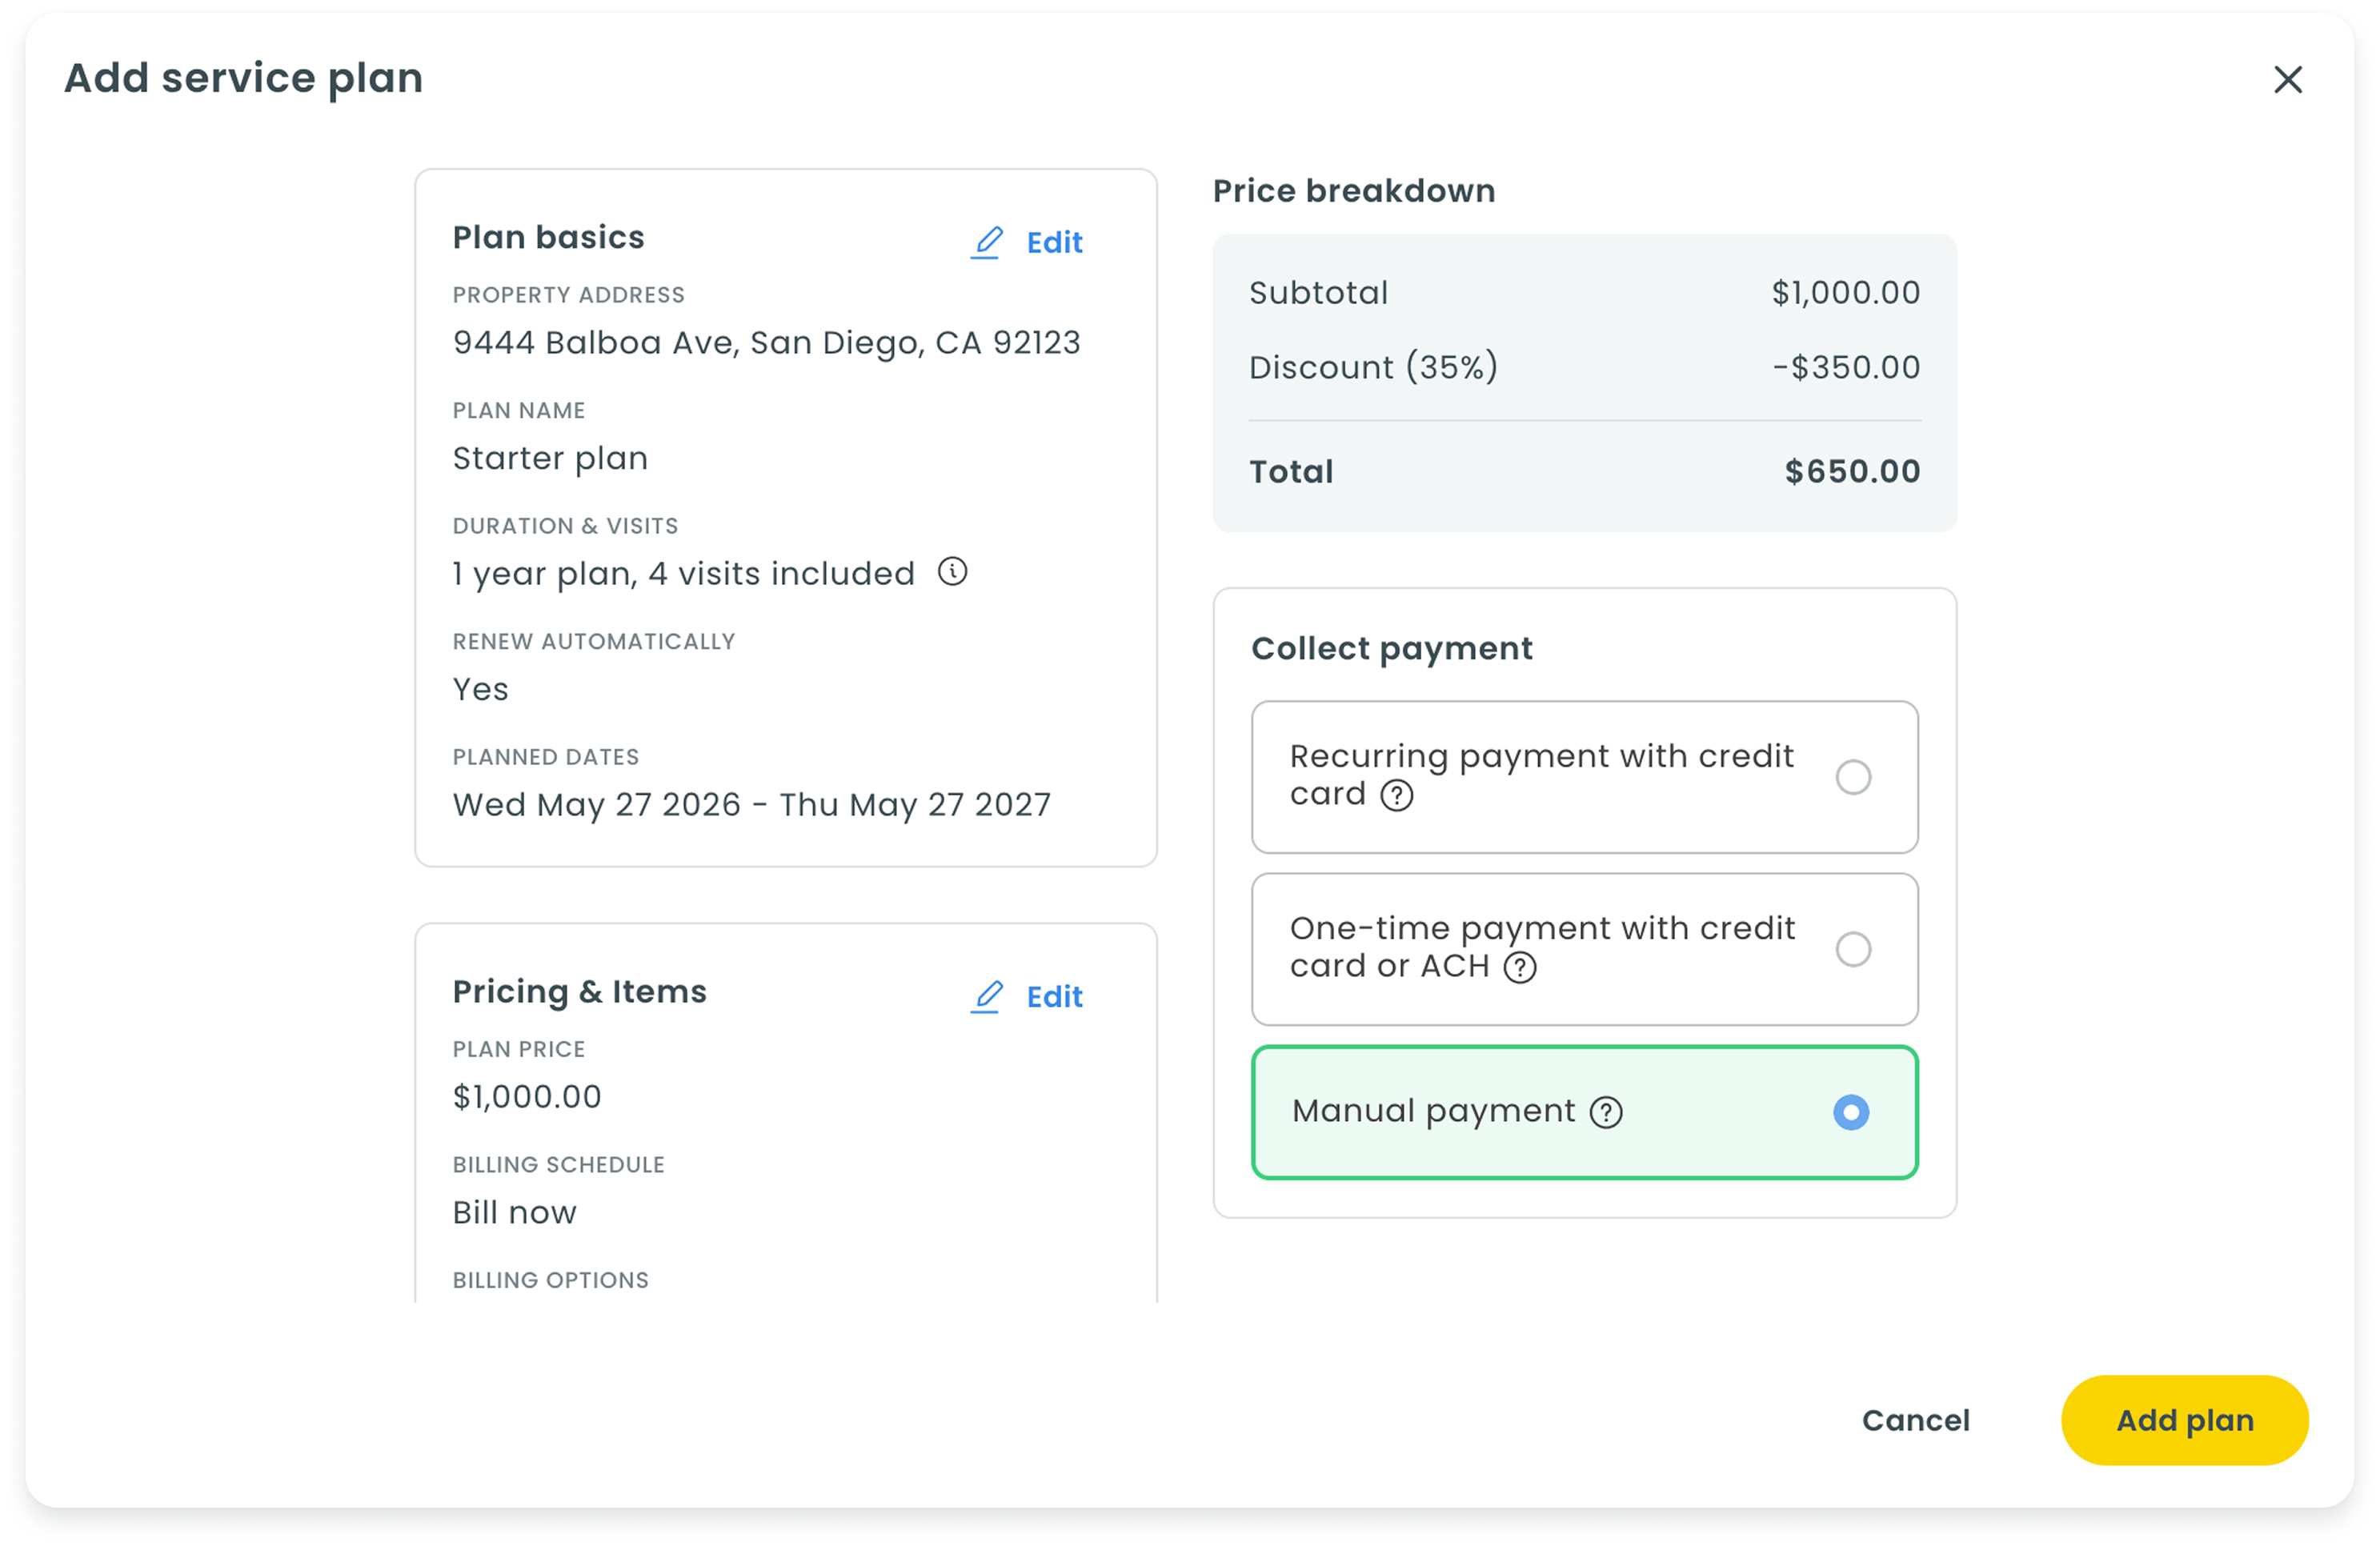
- Choose how you want to collect payment:
- Recurring payment with credit card: Send your clients a link to the client portal to review and pay for their plan offer via credit card. Cards will be saved on file and automatically charged when future payments are due.
- One-time payment with credit card or ACH: Send your clients a link to the client portal to review and pay for their plan offer via credit card or ACH. Payment details will not be saved for future payments.
- Manual payment: Accept the plan on behalf of your client and manually enter the payment yourself
- Select Add plan
Method 2: Using a custom plan
Instead of creating a plan template, you also have the option of enrolling your clients in a standalone custom plan.
Custom plans are not designed to be reused. If you would like to be able to save and use a plan for other clients, please create a plan template instead.
To learn more about creating plan templates, please see this article.
- Open the profile for the client you want to enroll
- In the client's profile, select Create new > Service plan
- Select the property address and choose Custom plan
Many of the remaining steps for creating a custom plan are similar to enrolling clients in a plan template. For more guidance on how to enroll clients in a custom plan, please see the previous section.
What your clients will see
Your clients will receive an email or text message that includes a link to the Workiz client portal. From there, they will be able to review, approve, and — if you chose to send the payment request online — pay for the service plan.
Using retroactive start dates
As mentioned above, Workiz allows you to set a retroactive start date of up to three months when enrolling a client in a service plan.
Using a retroactive start date may trigger automatic billing for all accumulated cycles based on your plan schedule. For example, if your plan is set to bill monthly, and your start date is set to three months prior to the current date, your client may automatically be billed for the first three months of the plan.
If you choose to enter payment manually, you will be prompted to make the initial payment upon enrollment. All remaining payments will need to be made manually.
If you choose to send a payment request using the client portal, your client will be prompted to make the initial payment using a credit card. But because that credit card is saved on file to make automatic payments for all remaining billing cycles, your client may immediately be charged for all of the due payments.
To avoid a potential dispute, it's important to set clear expectations for your client when setting a retroactive start date.
Managing your client’s service plans subscriptions
After subscribing your client to a service plan, that client will automatically receive a badge next to their name so that you can easily keep track of which clients are subscribed to plans. This badge will appear on various pages throughout the platform.
In the client profile, you can select the "Service plans" tab to view all active plans under this client. Here, you can re-send the plan details, update payment details, or cancel the plan altogether.
Your client’s profile page will also now include a tab for Visits, giving you quick access to the past and future visits linked to this client. You will also have access to quick actions such as:
- Calling the client
- Messaging the client
- Converting the visit into a job
Managing all of your business’s service plan subscriptions
Workiz makes it easy to manage all of your business’s service plan subscriptions — providing you with information such as the plan price, start date, next visit date, and the team member who sold the plan.
To learn more about how to manage your service plans, please see this article.