In this article, you will learn how to manage client details, including contact information, history, and files.
Keeping accurate and organized client records is key to providing great service and staying on top of your jobs. With Workiz, you can easily view and manage everything tied to a client — from their contact info and notes to past jobs and uploaded files.
Whether you’re adding a new contact, pinning important notes, or reviewing job history, this guide will walk you through the tools available on the client page to help you stay informed and efficient.
Client billing snapshot
The financial summary at the top of the client profile provides a quick view of key metrics, including past due balances, outstanding totals, total revenue, and the number of estimates you've created for this client in the past.
Client activity tabs
Workiz gives you easy access to a centralized view of all of the activity and information related to a specific client. It includes organized tabs for tracking:
- Jobs
- Estimates
- Payments
- Addresses
- Custom fields
- Calls
- Service plans
- Visits
- Leads
- Sub clients
- Equipment
Managing client info
- From the client details side pane, select the vertical dots icon > Edit client info
Here, you will be able to edit your client's:
- Name
- Company name
- Contact information (phone, secondary phone, email)
- Description
- Payment terms (e.g., net 15, due upon receipt, etc.)
- Billing permissions (i.e., allows you to close jobs that have an outstanding balance)
- Auto-invoicing
- Parent clients
Description field
The client page makes it convenient to keep critical details visible at all times through the "Description" field. Here, you can store key information such as client preferences, entry instructions, or other important reminders that you want to make sure your team can't skip over.
Client tags
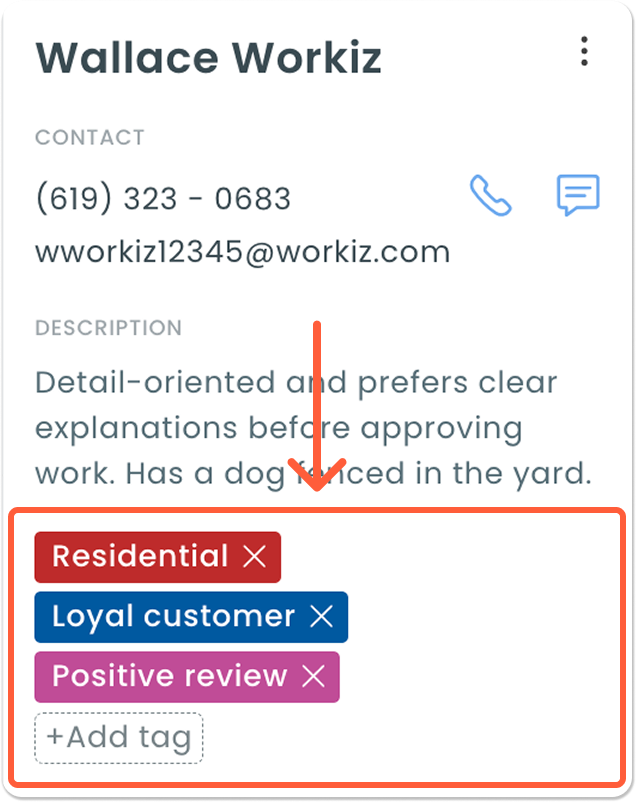
Client tags are a great way to categorize your clients for enhanced searchability, create more refined automation rules, and simply provide your team with more context for specific clients.
- Under the Description field, select add tag
- Create your tag:
- Tag name
- Tag color
- Select Save
To apply this tag to a client, select it from the list.
The tag you created for one client will now be appear on the list of available tags for all other clients on your Workiz account.
To learn more about the benefits of using client tags, please see this article.
Client addresses
When you create a new client in Workiz, you’ll start by entering one address — this will be used as both the billing and service address by default. You can always add more properties later, so everything stays organized under a single client profile.
Editing a client's service or billing address
You can edit a client's primary service or billing address right from the client details side pane.
- From the client details side pane, select Addresses
- Select the pencil icon next to the address you want to edit
- Make your desired changes and select Save
Creating a new address
If you'd like to add an address for this client, you can do that from the address editor or from the "Create new" button on this client's profile page.
- From the client's profile page, select Create new > Address
- Enter the address details and select Save
Additional contacts
Your client may occasionally have another person that you'll be interacting with to complete certain services. You can even set additional contacts as billing contacts to ensure they are always CC'd on billing-related emails (i.e., sending estimates and invoices).
To add an additional contact:
- Next to Additional contacts, select the + icon
- Create your additional contact:
- Name
- Contact (e.g., phone, email)
- Role
- Address
- Set as billing contact
You must have an email saved for this additional contact in order for them to receive billing-related emails.
- Select Add contact
Payment methods
Workiz makes it easy to add and manage your client’s preferred payment methods directly from their profile page. You can securely store multiple cards and update details as needed. This helps streamline checkout and ensures a smooth payment experience for both you and your client.
- Next to Payment methods, select the + icon and choose one of the following options:
- Add card: Enter your client's card details yourself
- Request card: Send your client a request to save their card details online
After saving, their card will be available for future use on jobs, estimates, and invoices. To learn more about how to collect payments with saved cards, please see this article.
Notes
The "Description" field helps keep key client details front and center, visible whenever you view their profile. You can also add notes at the client level to share important updates or context with your team.
By default, notes are listed in chronological order — but you can pin any note to the top to make sure it stays easily accessible.
To add and pin a note:
- On the right side of the page, select Notes
- Select Add note
- Create your note and select Save
- Select the pin icon to pin the note to the top of the feed
Client history
The client page also provides you with a detailed timeline of all client interactions related to:
- Jobs
- Leads
- Estimates
- Invoices
- Calls
- Payments
- Service plans
- Equipment
- Notes
You can filter the feed by activity type (e.g., jobs, equipment, etc.) to quickly find the specific event that you're looking for without sifting through unrelated entries. Select any link to be redirected to the specific event.
Client files
All files (e.g., PNG, JPG, PDF, docs) that you have previously saved onto this client's estimates, invoices, and jobs will be aggregated and displayed in their profile. You can also upload files directly onto a client's profile.
Files will be grouped by the month in which they were uploaded, making it easy for you to find what you're looking for.